We’re excited to announce the release of License Manager 2.0, a major update to how you sell, protect, and scale software from WordPress.
License Manager works for WordPress and WooCommerce plugins, themes, SaaS products, and desktop software. You connect any payment gateway you already use, and we take zero commission on your sales.
This product release note walks through what’s new, why it matters, and how to set it up.
License Manager 2.0 Summary
| Feature | Description |
|---|---|
| React Dashboard | Live analytics, status bar, customizable blocks, and a switch back to the legacy UI |
| Applications and SDK | Sell plugins, themes, SaaS, and desktop software with built-in activation |
| License Management | Bulk actions, search, CSV export, bulk import, and hidden keys by default |
| Generators | Automatic key creation with custom character maps, prefixes, and expiry rules |
| Activations and Installed On | Track every activation, device, IP, and last ping |
| API Logs | Audit trail for every REST API request |
| Subscriptions | Issue new keys or extend existing keys on renewal |
| AppSumo Integration | Automatic licensing for AppSumo purchases |
| Analytics Reports | License sales, activations, and top products by date range |
Version Update | What’s New in License Manager 2.0
1. New React-Based Dashboard
License Manager now runs on a faster, cleaner React interface. The new Analytics Dashboard gives you a live view of revenue, orders, activations, and customer activity on a single screen.
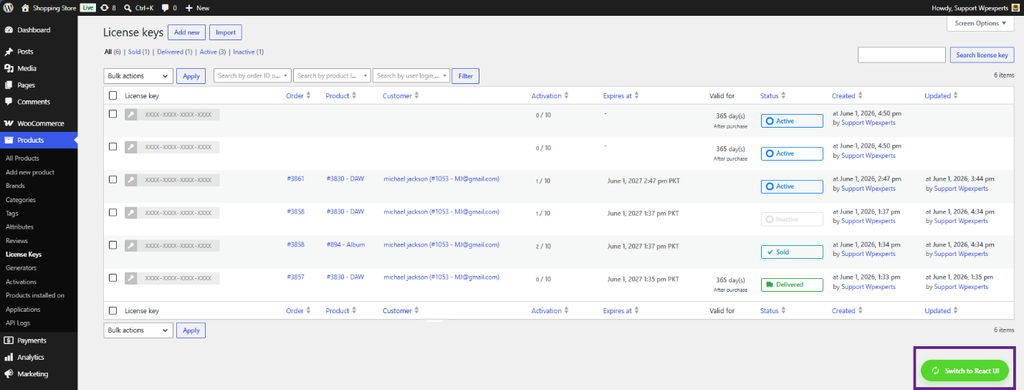
If you prefer the previous interface, you can switch back to the legacy UI at any time.
What’s on the Dashboard
- Status Bar: A live count of licenses by state: Active, Inactive, Sold, Delivered, and Expiring Soon.
- Summary Cards: License Revenue, Total Orders, Total Installed On, and Total Customers. Each card shows a trend indicator, such as +100% over the last 30 days.
- License Performance Chart: A bar chart of Licenses Created vs Activated. Use it to spot the gap between licenses issued and licenses actually used. You can also view it as a line chart.
- Recent Distribution: The latest license keys issued, with masked keys, customer and product, expiry, and status.
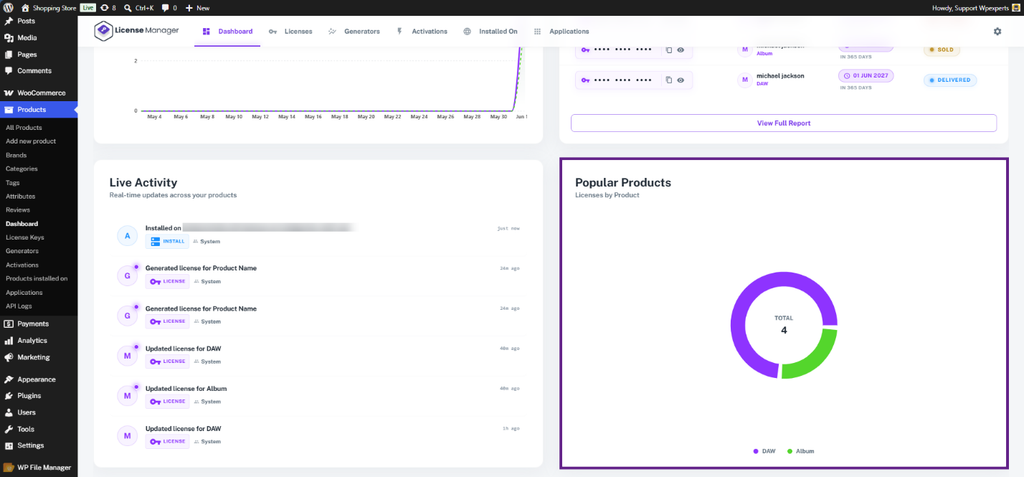
- Live Activity Feed: A real-time log of installs, license updates, activations, and application changes.
- Popular Products: A donut chart showing which products drive the most license volume.
Customize Your Dashboard
Open Dashboard Settings to shape the layout around what you check most.
- Density: Switch between a compact and a spacious layout.
- Blocks: Show or hide individual dashboard blocks.
- Block Drag n Drop: Rearrange blocks by dragging them into place. This option is available in the premium version.
- Auto-Refresh: Refresh dashboard data at regular intervals.
- Rows to Show: Set how many rows appear in tables and lists.
The Update Data button in the top right refreshes every metric on demand. The Quick Access Menu links to Documentation, Plugin Settings, API Logs, and the Legacy Version switch.
2. Applications and the New SDK
Applications are the biggest structural change in 2.0. You create an application for each product you sell, whether it’s a WordPress plugin, a theme, a SaaS product, or desktop software. You then link that application to a WooCommerce product.
To make this work, License Manager 2.0 ships with a new SDK. You add the SDK to your project, paste the initialization code into your main PHP file, and the SDK handles:
- License key activation
- License validation
- Communication with License Manager
- Customer license verification
Two SDKs are available:
- WordPress SDK for plugins and themes
- SaaS PHP SDK for standalone software, SaaS platforms, and desktop applications

How to Create an Application
- Go to License Manager → Applications and click Add Application.
- Enter the application name. A Public Key is generated automatically. The SDK uses this key to connect securely to License Manager.
- Choose a Category, such as WordPress Plugin.
- Add an Application Summary and click Save Changes.
Add the SDK to Your Product
- Download the SDK from GitHub. Use the Plugin and Theme SDK for WordPress products, or the SaaS SDK for everything else.
- Add the SDK folder to your plugin or theme’s vendor directory.
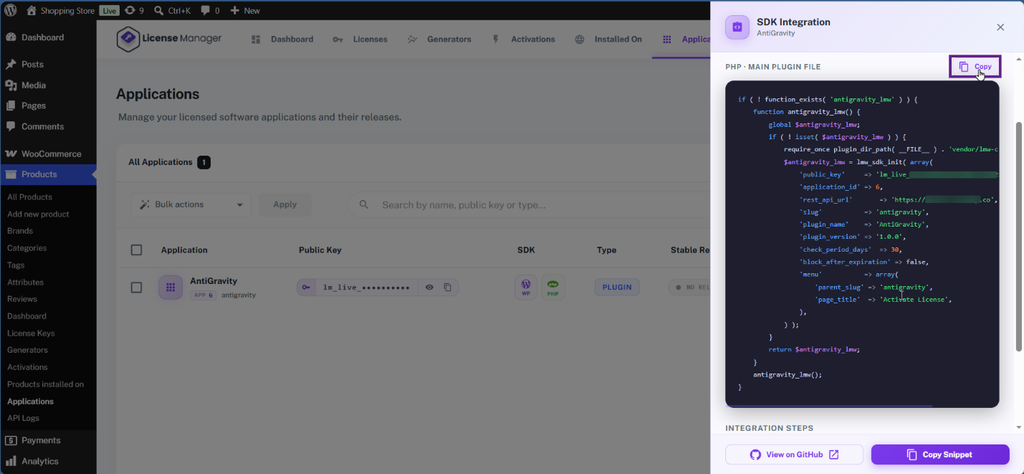
- On the application screen, pick your SDK option and click Copy to grab the code snippet.
- Paste the snippet into your product’s main PHP file.

Publish a Version
- Open your application and go to the Versions tab.
- Click Add Release.
- Enter the version number and the changelog.
- Upload the ZIP file that contains the integrated SDK, and add the technical requirements.
- Click Publish Release, then mark the version as Stable.

You can also upload product screenshots under the Assets tab and add documentation and support links under Portal Links.
Assign the Application to a Product
- Edit or create a WooCommerce product.
- Open the License Manager sub-tab.
- Select your application under Select Application.
- Publish the product.
Product options include Sell License Keys, Delivered Quantity, Generate License Keys, Assign Generator, and Sell from Available Stock. These work for both Simple and Variable products.
Customer Experience
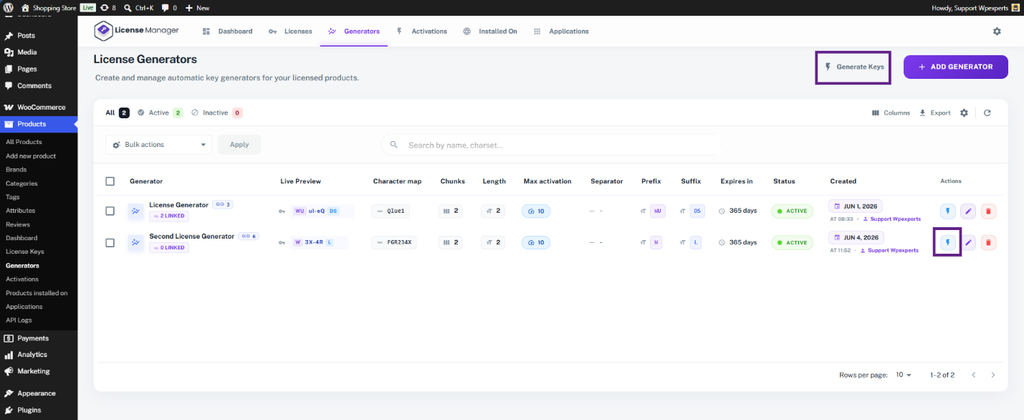
Once you mark the order as Completed, the customer finds their license key under
My Account → License Keys.
From there, they can download the plugin ZIP, download a license certificate, and activate the key.
3. Redesigned License Management
The Licenses tab is now the central hub for every license you manage. A status bar at the top shows active, inactive, sold, delivered, and expiring licenses at a glance.
Each row shows the license key, the linked order, product, and customer, activations used vs. allowed, expiry, validity period, status, and a short activity log.
Add a License Manually
- Click Add License.
- Set the status and enter the license key.
- Choose the product.
- Set either a Valid For duration in days or a specific expiry date, plus the maximum activation count.
- Optionally assign a customer and order.
- Click Register License.
Note: If you enter a value in the Valid For field, the specific expiry date and time won’t apply. To expire a key at an exact date and time, leave Valid For empty.

4. Generators for Automatic Key Creation
Generators create and deliver license keys automatically when a product sells. You set the rules once, and every key follows them.
Create a License Key Generator
- Go to Products → Generators and click Add Generator.
- Enter a name.
- Set the Character Map. If you enter FGR234X, keys use only those characters.
- Set Chunks (number of sections) and Chunk Length (characters per section).
- Set the Separator between chunks.
- Add an optional Prefix and Suffix.
- Set the Max Activation count and the Expiry period in days.
- Click Create Generator.

Generate Keys in Bulk
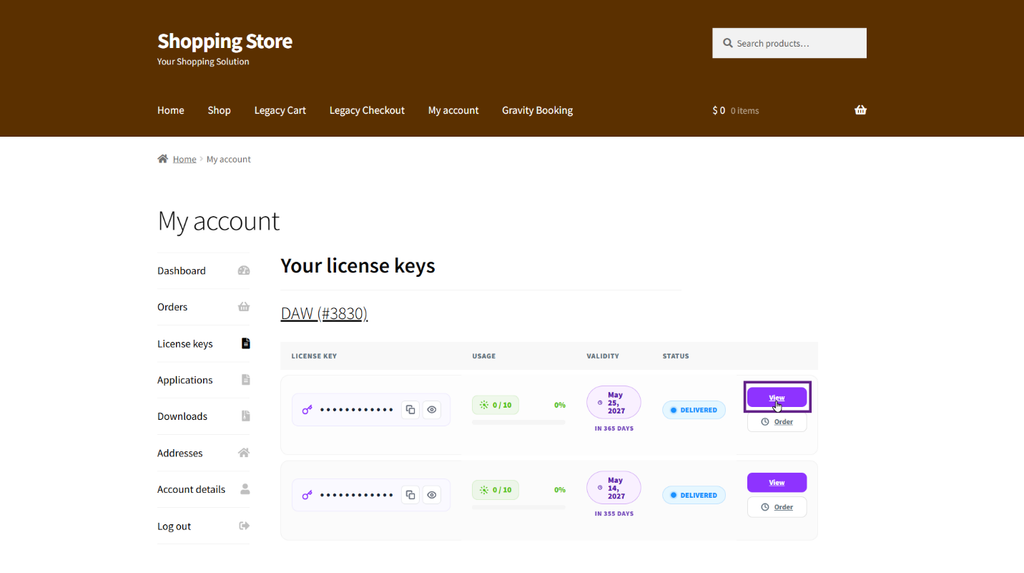
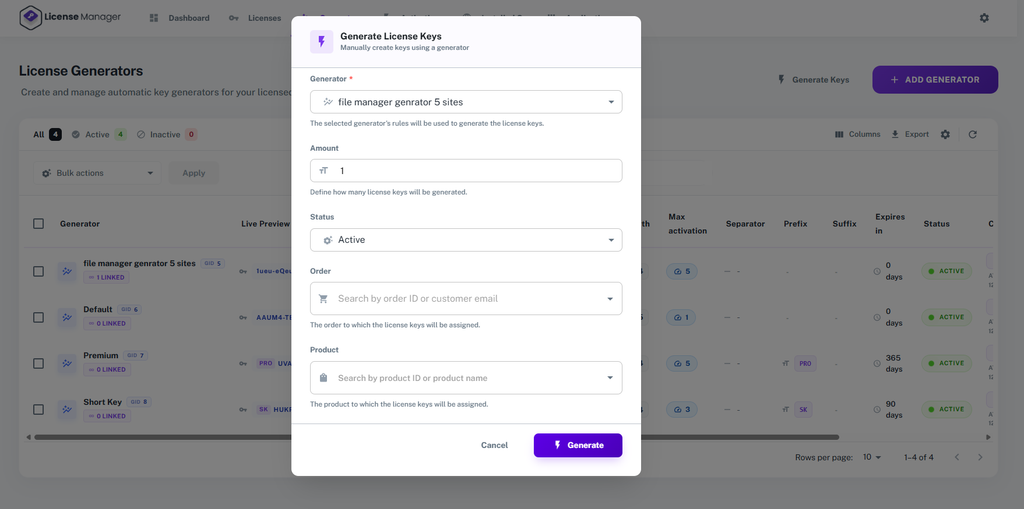
Click Generate Keys at the top, or Quick Generate on a specific generator’s row.
Enter the amount, choose a status, optionally attach an order, and assign a product.
Click Generate.
To deliver keys automatically at checkout, edit the generator, pick a product under Assign Product, and save.
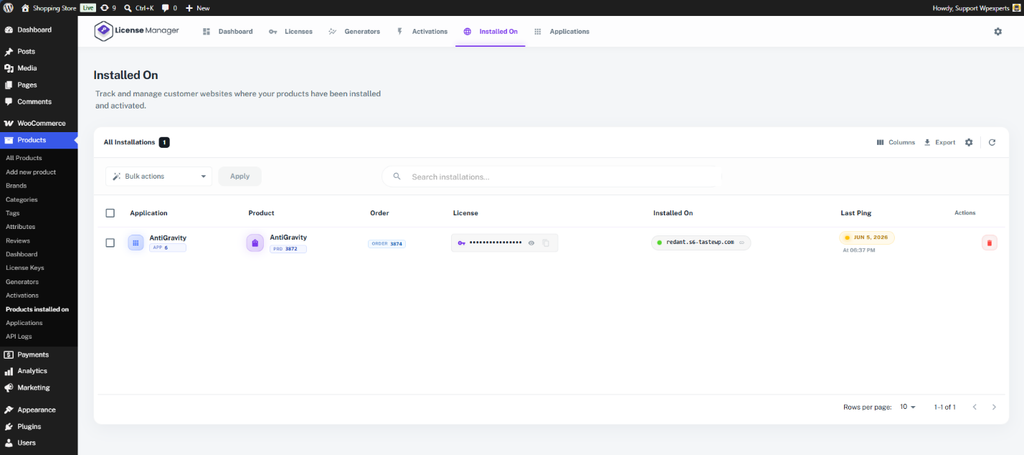
5. Activations and Installed On Tracking
Customers can activate a license in four ways:
- REST API for custom applications
- QR Code for mobile scanning
- Web page activation from My Account
- SDK for built-in activation inside your software
6. API Logs
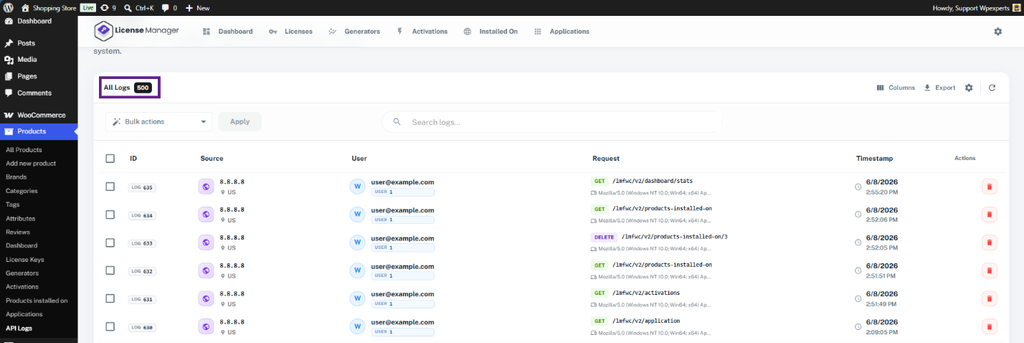
API Logs give you an audit trail of every REST API request to your License Manager. Use them to debug integrations, watch activity, and track activations and deletions.
Each log entry records an ID, source IP and country code, user, HTTP method, endpoint route, user agent, and timestamp.
You can search, bulk delete, choose columns, and export the log history.
You can reach API Logs from the dashboard’s Quick Access Menu.
7. Subscription Support
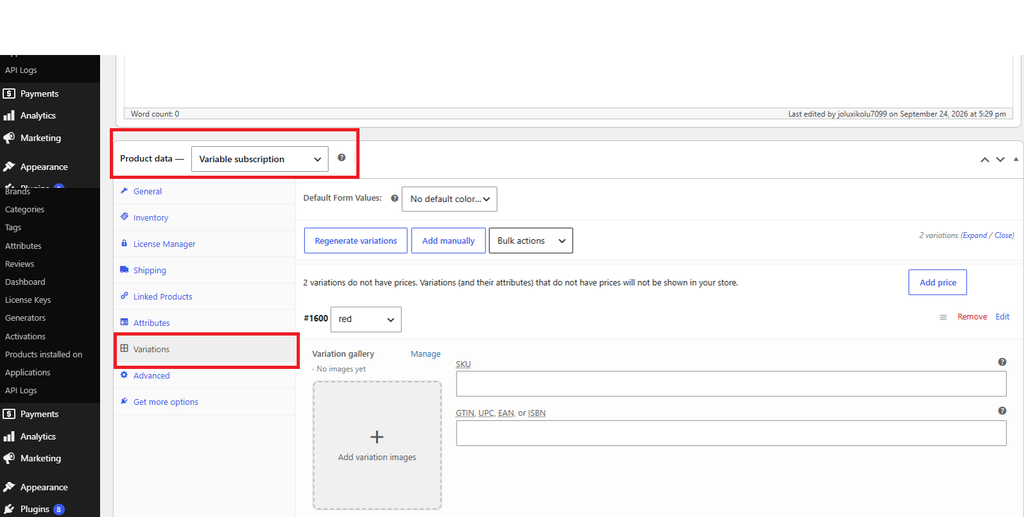
License Manager supports Simple Subscription and Variable Subscription products, so you can sell software with recurring billing.
For each subscription product, you choose what happens on renewal:
- Issue a new license key to the customer, or
- Extend the existing license key. When you pick this option, you can extend by the WooCommerce subscription interval or set a custom interval in days, hours, weeks, months, or years.
For variable subscriptions, the same options appear on each variation.
Note: This feature requires the WooCommerce Subscriptions plugin.

8. AppSumo Integration
If you sell through AppSumo, License Manager now handles licensing and activation for those purchases. Each application gets its own AppSumo configuration tab.
Setup in brief:
- Go to WooCommerce → License Manager → AppSumo and copy the Webhook URL and OAuth Redirect URL.
- Paste them into the API Settings in your AppSumo Partner Portal and click Validate. Your server must return a 200 OK.
- Copy the API Key, Client ID, and Client Secret from AppSumo back into License Manager.
- Add the [lmfwc_appsumo_activation] shortcode to a page and select it as the Activation Page.
- Choose the linked WooCommerce product and set the activation count for each AppSumo tier.
- Click Save Changes.
After that, purchases on AppSumo flow into your licensing system automatically. New customers land on your registration page, and existing customers go to My Account.

More Improvements in License Manager 2.0
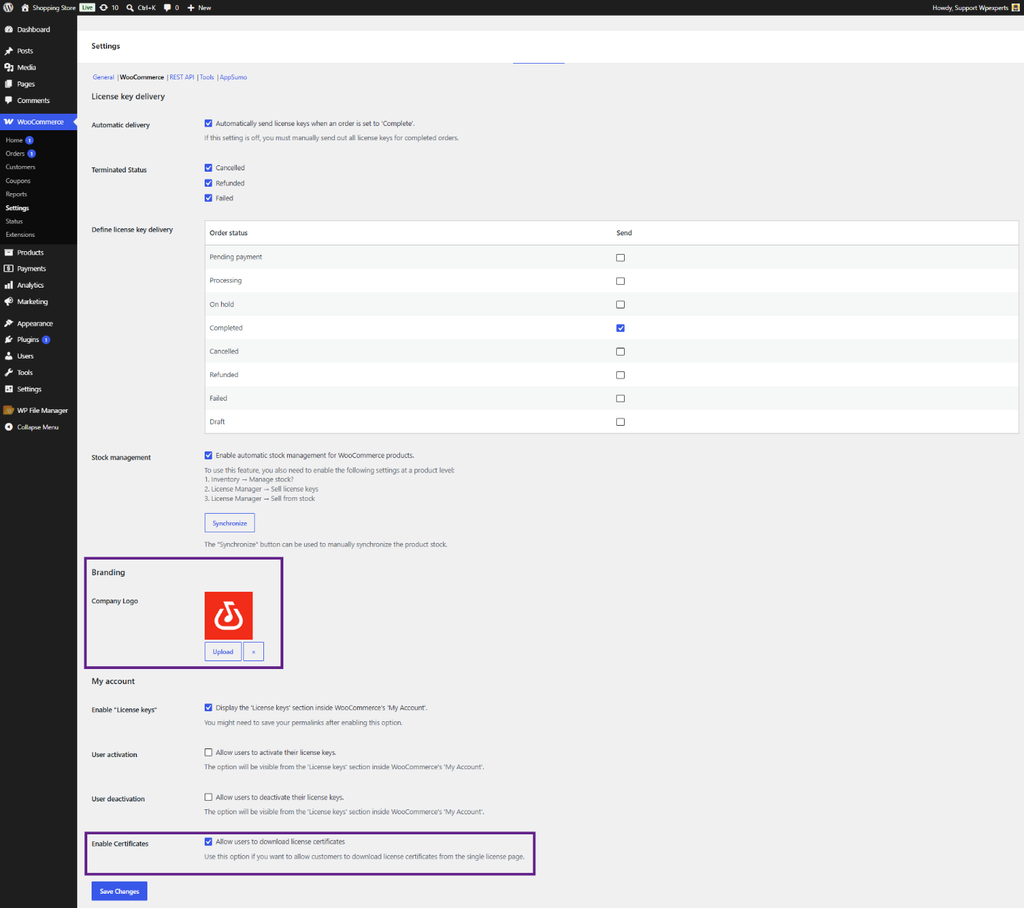
- License certificates with your logo. Upload a company logo under Branding. Customers see it on the certificate PDF they download from My Account.
- Terminated status. Licenses are discarded automatically when an order is Refunded, Cancelled, or Failed.
- Flexible delivery. Choose which order statuses trigger license delivery, or turn off Automatic Delivery to review orders manually.
- Stock sync. Sell license keys from stock and keep WooCommerce stock levels in sync.
- Grace period. Give customers extra time to renew a license, set in days, weeks, months, or years.
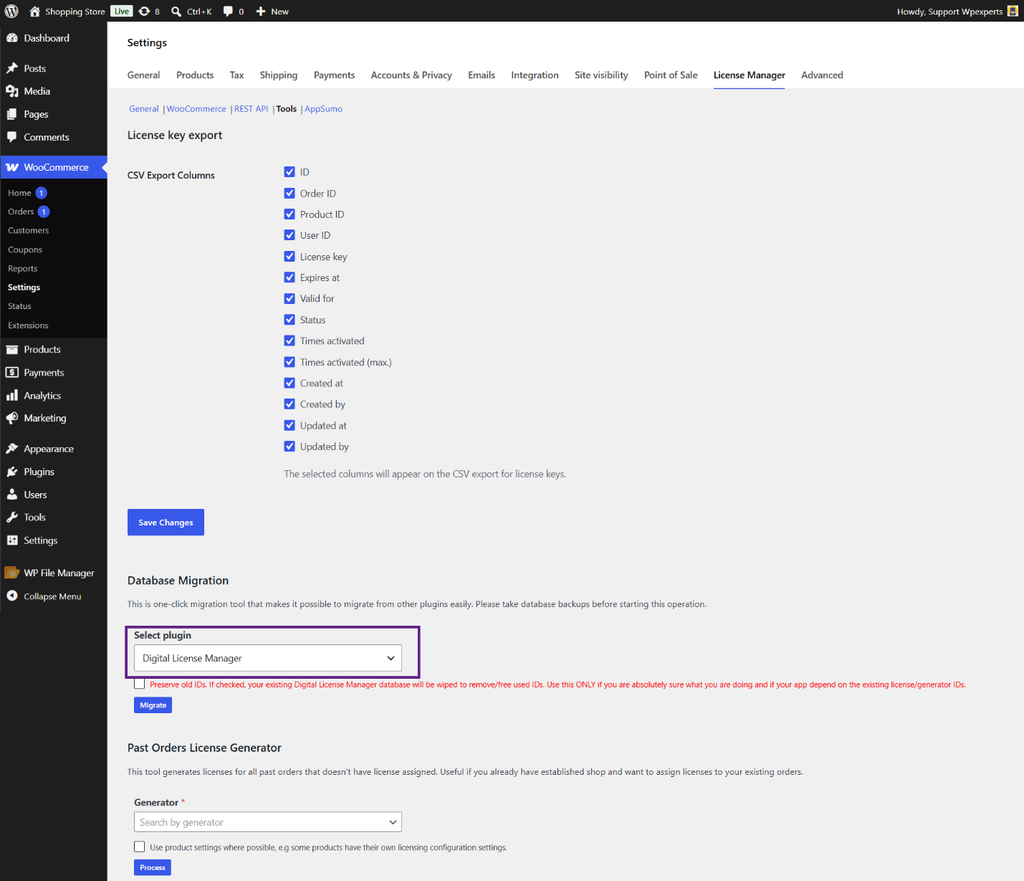
- Migration tool. Move license keys from Digital License Manager with one click.
- Past Orders License Generator. Assign licenses to past orders that don’t have one yet.
- Obscure licenses. Hide keys in the admin dashboard until someone clicks Show.
License Manager 2.0 For Developers
License Manager 2.0 includes tools for teams that build on top of it.
- SDKs. Use the WordPress SDK for plugins and themes, or the SaaS PHP SDK for standalone software. Libraries are also listed for Node.js, Python, PHP, Ruby, .NET, C, C#, C++, and Golang.
- REST API (v2). Routes cover licenses (list, retrieve, create, update, delete, activate, reactivate, deactivate, validate), generators, customers’ licenses, product ping, updates and downloads, and applications. Authenticate with a Consumer Key and Consumer Secret.
- Hooks and functions. Filters such as lmfwc_rest_api_validation and lmfwc_rest_api_pre_response let you validate custom request data and modify responses. Helper functions include lmfwc_add_license(), lmfwc_get_license(), lmfwc_activate_license(), and lmfwc_deactivate_license().
- Template overrides. Copy any template into your theme’s /woocommerce folder to customize front-end pages and emails.
- Security. You can move your cryptographic secrets into wp-config.php for stronger protection. Enable API routes only when you use them, and keep the API on HTTPS in production.
Requirements to Upgrade License Manager 2.0
- PHP 7.4 or above
- WordPress 5.6 or above
- WooCommerce 6.0 or above
- WordPress Permalinks set to any structure other than Plain (Post Name is recommended)
Ending Note
License Manager 2.0 focuses on control, visibility, and speed. The new dashboard shows you what’s happening in your license program right now. Applications and the SDK let you ship software with built-in activation. Generators, subscriptions, and AppSumo support take the manual work out of delivering keys.
So, update your plugin today and see how much faster license management can be.